Last Updated: November 1, 2026
Quick Summary
Before hydroseeding, you must test your soil for type, pH and drainage, then amend and loosen the top 100-150 mm so the seedbed is crumbly and open. Clear all vegetation, weeds, rocks and debris, grade the surface level, and confirm the seedbed is firm, moist and free of herbicide withholding periods before spraying.
- A jar test shows your sand, silt and clay layers after 24 hours of settling.
- Most lawn grasses prefer soil pH of roughly 6 to 7.
- Remove rocks and debris larger than a golf ball from the surface and top 50 mm.
- Walk across the seedbed: your boot should leave a shallow print, not sink.
- Avoid spraying ahead of heavy rain, which can wash the slurry off before it binds.
Table of Contents
- Hydroseeding Site Preparation: What Happens Before the Slurry
- How to Prepare Soil for Hydroseeding: Test, Amend, Loosen
- Clearing Vegetation, Weeds, Rocks and Debris
- Grading, Topsoil and Getting the Seedbed Level
- Hydroseeding on Slopes: Drainage and Erosion Control
- Checking the Seedbed Is Ready and Timing the Spray
- Get a Free Quote and Lock In Your Hydroseeding Date
- Frequently Asked Questions
Hydroseeding Site Preparation: What Happens Before the Slurry
A common mistake before hydroseeding is treating the spray day as the start of the job. It isn’t. What you do to the ground in the weeks prior decides whether the seed takes or washes away in the first storm.
Hydroseeding is the process of spraying a wet mix of seed, mulch, fertiliser and a tackifier onto prepared ground so the seed sits in close contact with the soil. The slurry is only as good as the seedbed beneath it.
This guide covers the full sequence, from soil testing to the final readiness check. Below, we break down each step so you know exactly what to do before hydroseeding.
How to Prepare Soil for Hydroseeding: Test, Amend, Loosen
Good soil preparation for hydroseeding starts with knowing what you have. Dig a few test holes and check three things: soil type, pH and drainage. Then fix what’s wrong before any seed goes down.
Sandy ground drains fast and dries out. Heavy clay holds water and crusts over. Both can be worked, but they need different amendments.
| Test result | What it means | Typical amendment |
|---|---|---|
| Sand layer dominates the jar | Fast drainage, poor moisture and nutrient holding | Compost or aged manure worked into the top 100-150 mm; consider a wetting agent |
| Clay layer dominates the jar | Slow drainage, crusting, poor aeration | Gypsum where the clay is sodic; organic matter to open structure; avoid over-tilling wet clay |
| Balanced sand/silt/clay | Reasonable structure | Light organic matter and a starter fertiliser |
| pH below about 5.5 | Acidic; some nutrients lock up | Agricultural lime, worked in and given time to react |
| pH above about 7.5 | Alkaline; iron and some trace elements less available | Organic matter and a fertiliser suited to alkaline soil; elemental sulfur only with care |
| Water sits in the drainage hole for hours | Compaction or a heavy clay layer | Deep ripping or core aeration before surface work |

Testing Soil Type, pH and Drainage
A simple jar test tells you a lot. Fill a jar one-third with soil, top it with water, shake it, and let it settle. Sand drops first, then silt, then clay. The layers show your mix.
For pH, a basic garden kit is enough for a rough read. Most lawn grasses prefer slightly acidic to neutral soil, roughly pH 6 to 7. If your test sits well outside that range, amendments will help the seed germinate.
Drainage is the one people skip. Dig a hole about 300 mm deep, fill it with water, and see how long it takes to empty. Water that sits for hours signals compaction or heavy clay underneath.
Amending and Loosening Compacted Ground
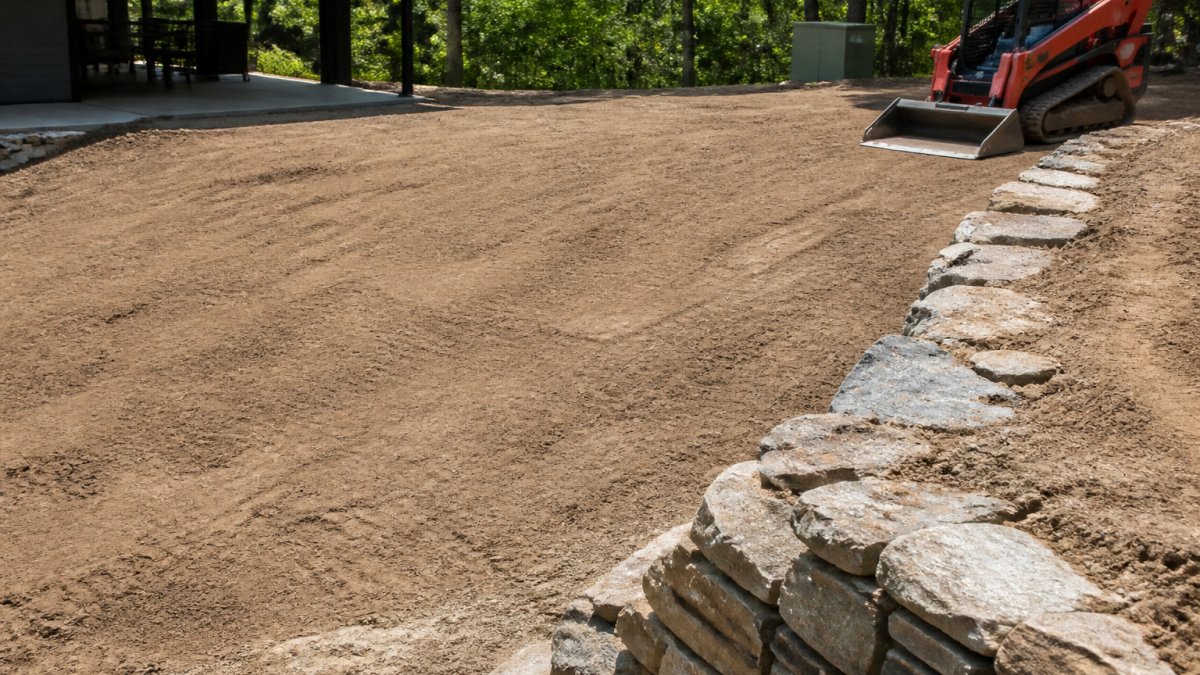
Compacted ground is the enemy of seed-to-soil contact. Loosen the top layer with a rotary hoe, a tyne cultivator or a garden fork on small blocks. Aim for a crumbly, open surface, not dust. Work to a depth of about 100-150 mm, deep enough for roots to establish, shallow enough to keep the topsoil you’ve added.
Add organic matter to sandy soil to hold moisture. Add gypsum or organic matter to heavy clay to improve structure. A starter fertiliser worked into the top layer gives seedlings what they need early.
Test, amend, then wait. Lime and gypsum need time and moisture to react. Applying them the day before spraying gives the seed none of the benefit.
If the ground is severely compacted, for example, a new build where machinery has tracked over the block, a single pass with a fork won’t fix it. Deep ripping or core aeration first, then surface amendment, is the sequence that works.
Clearing Vegetation, Weeds, Rocks and Debris
Strip the site back to bare soil before anything else. Remove existing grass, weeds, roots, rocks and debris. Any vegetation left behind competes with your new seed for water and light, and it usually wins.
On larger blocks, a skid-steer or excavator makes short work of it. On a suburban yard, a mattock and a rake will do.
- Pull or spray existing weeds, including the roots
- Remove rocks and rubble larger than a golf ball
- Clear sticks, timber and construction debris
- Scrape off old turf and thatch
Weed control timing matters. If you spray herbicide, allow the full withholding period on the label before seeding. Spraying and seeding in the same week is a common mistake that kills germination.
Watch out: seeding too soon after herbicide leaves you with bare patches and wasted slurry.
Grading, Topsoil and Getting the Seedbed Level
Level the ground so water spreads evenly instead of pooling. Fill hollows, knock off high spots, and shape the surface so it sheds water where you want it to go.
Spread topsoil where the existing ground is poor or shallow. A consistent layer gives roots somewhere to establish. Rake it to an even depth and firm it lightly.
The seedbed should be firm but not hard. Walk across it and your boot should leave a shallow print, not sink.
For a deeper look at where this step can go wrong, see how to weigh up the downsides of hydroseeding before you commit to the prep work.
Hydroseeding on Slopes: Drainage and Erosion Control
Slopes need extra attention because water moves fast across them. On any gradient, the goal is to slow runoff and hold the seed in place until roots take over.
- Shape the slope to break up long, straight runs of water
- Use a heavier mulch rate and a stronger tackifier on steeper ground
- Consider erosion matting or netting on the steepest sections
- Direct runoff away from the seeded area with a shallow diversion
Drainage and erosion control are where a cheap job shows its weaknesses. A blend that holds on flat ground can slide off a slope in the first heavy downpour.
Checking the Seedbed Is Ready and Timing the Spray
Before you book the spray, run a final check. The seedbed is ready when the surface is level, firm, free of weeds and debris, and moist below the top layer. A missed step in these checks is often what leads to a reseed.
Here is a readiness checklist, with the test that confirms each item:
- Vegetation and roots fully removed, scrape a hand through the top 50 mm; no live root fragments should pull up
- Rocks and debris cleared, nothing larger than a golf ball on the surface or in the top 50 mm
- Soil loosened and amendments worked in, a fork pushed into the bed should go in easily to about 100 mm
- Surface graded and topsoil spread evenly, a straight edge laid across the bed shows no hollows deeper than about 20 mm
- Slope drainage addressed, pour a bucket of water on the slope; it should run off in a sheet, not channel into a gully
- Soil moist but not waterlogged, squeeze a handful; it should hold together and leave a damp film on your palm, not drip
- Herbicide withholding period complete, check the label; the waiting period is stated in days and varies by product
- No heavy rain forecast for the spray window, check the forecast for the 24-48 hours after spraying
The firmness test is the one most people get wrong. Walk across the bed, your boot should leave a shallow print, not sink. Soil that’s too loose dries out and the slurry washes off; soil that’s too hard stops roots establishing.
Timing the Spray Around Weather and Season
Timing matters as much as prep. Hydroseeding works best when the soil is warm and there’s moisture in the forecast. Avoid spraying ahead of heavy rain, which can wash the slurry off before it binds. In many regions, the shoulder seasons, when soil is warm but the heat hasn’t dried the surface, give a good germination window. Mid-summer spraying on exposed ground needs more water and a heavier mulch rate; mid-winter spraying on cold soil slows germination and leaves the seed exposed longer.
A common pattern is to prepare the bed, then wait for a forecast of light, steady rain rather than a downpour. Light rain helps the slurry cure; heavy rain erodes it.
Confirming Responsibilities Before Spray Day
If you’re coordinating with a contractor, confirm who handles clearing, topsoil and watering. Clear responsibilities avoid gaps on spray day. Ask specifically:
- Who removes the last of the debris and does the final rake?
- Who supplies and spreads topsoil, and to what depth?
- Who waters the new surface in the first two weeks if rain doesn’t arrive?
- Who checks the herbicide withholding period, and who signs off that it’s complete?
| Step | What It Involves | Why It Matters |
|---|---|---|
| Soil testing | Check type, pH, drainage | Guides amendments |
| Loosening | Break up compaction | Better seed contact |
| Clearing | Remove weeds, rocks, debris | Stops competition |
| Grading | Level and add topsoil | Even water spread |
| Slope work | Tackifier, matting, drainage | Prevents wash-off |
| Readiness check | Moisture, timing, checklist | Protects the investment |
A seedbed is ready when it passes the tests, not when the tasks are ticked off. If any single test fails, fix it before spraying, reseeding costs more than one more day of prep.
Get a Free Quote and Lock In Your Hydroseeding Date
The prep work is the hard part, and it’s the part most people rush. Get the seedbed right and the slurry does its job. Skip a step and you may be reseeding.
Tropic Turf Hydroseeding provides lawn establishment, revegetation and erosion control across Townsville and surrounding areas, helping transform bare ground into green spaces for homes, new builds, acreage and commercial properties, using seed blends suited to North Queensland conditions.
Get a free quote to lock in your hydroseeding date.
Frequently Asked Questions
Do I need to remove weeds before hydroseeding?
Yes. Existing weeds and grass compete with new seed for water, light and nutrients, and many will regrow through the mulch. Remove them by hand, machine or a suitable herbicide, then wait for the recommended withholding period before sowing. Clear the site at least a couple of weeks before the spray date so any regrowth can be treated. Bare soil with no living competition gives the seed-to-soil contact it needs to germinate evenly.
Should I add topsoil before hydroseeding?
Add topsoil where the existing ground is rocky, badly compacted or low in organic matter. Spread a 50-100 mm layer of quality topsoil and blend it into the surface rather than leaving a loose cap. On a new build, scrape and stockpile the original topsoil during earthworks, then respread it before hydroseeding. If the base is already workable loam, you may only need to loosen and level it. A soil test tells you which situation you have.
Can hydroseeding be done on a slope?
Yes, and slopes are where hydroseeding has a real advantage over dry seed. The slurry, mulch and tackifier bind to the surface and hold seed in place where broadcast seed would wash away. Preparation still matters: rough up the surface so material keys in, and install contour banks or diversion drains above the slope to control water. Very steep or long slopes may need erosion matting or a bonded fibre matrix. Talk to the contractor about the gradient before the spray date.
How soon after preparing the soil should hydroseeding begin?
Spray as soon as the seedbed is ready, ideally within a few days of final grading. Freshly loosened bare soil is vulnerable to wind and water erosion, and weeds start colonising within weeks. If rain is forecast, wait until the surface drains and is workable again rather than spraying into mud. Have the contractor booked before you start clearing so there is no long gap between preparation and hydroseeding.

Leave a Reply